Welcome to Part 1 of the Burdastyle Andrew cardigan sew-along. Let’s talk about fabric, printing the pattern and cutting it out. Burdastyle recommends wool knit fabric or cotton sweatshirt fabric for this project. I wanted to make my cardigan really cozy, so I’ve opted for this black, organic sweatshirt fleece from Fabric.com. You also need ribbed knit fabric for the cuffs and waistband. My husband wears brightly coloured t-shirts to work, so I’ve kept the cardigan simple by keeping everything black.
On the Burdastyle website, there are some great versions of Andrew using a contrasting rib knit. You also need matching interfacing and buttons. The pattern calls for snap buttons, but I’m using standard plastic buttons instead.
Printing
If you’re printing the sewing pattern at home, you need to use either A4 or Legal Size (US) paper. Being new to the US, I had no idea what Legal Size meant. It seems to be a longer version of the standard, A4 size. The most important thing is to set the printer to DO NOT SCALE.
Gluing and cutting the pattern
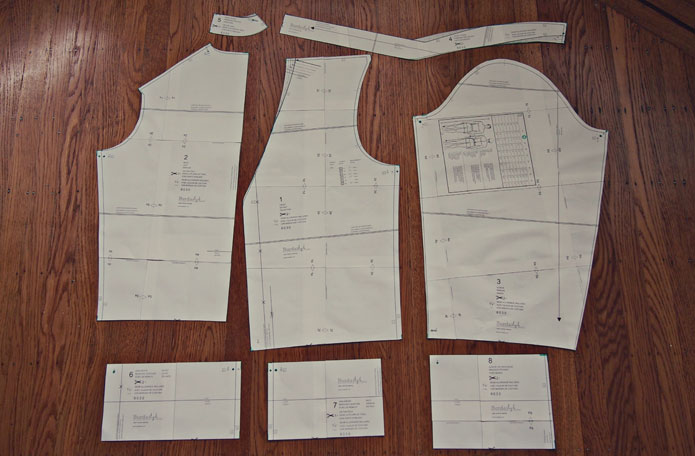
Definitely not my favourite part of sewing! I l trimmed the top and right edges of each sheet using a stanley knife and stick the sheets together with a glue stick. Just listen to a podcast and it’ll all be done before you know it. There are 8 pattern pieces in total.
Cutting the pattern and fabric
What is labelled as ANKLE BAND is actually the front waist band. The instructions tell you to mark the placement of the top snap button on the FRONT body piece. To do this, I measured the distance from the edge of Size 44 to the black X mark on the sewing pattern (1 1/16″). Then, slide your ruler up until you hit the edge for the size which you are making. My cardigan will be Size 46, so this is where I placed the X (in red) for my top snap button. Mark the same spot on your fabric.
Interfacing
Interfacing is required along the three facing pieces. I like to pin my fabric on to the interfacing and then cut it out.
That’s it for Part 1! Next time, let’s sew the body and the waistband. What fabric have you chosen to use for your Andrew cardigan?


2 comments
[…] break down the sewing process into a few blog posts, similar to the Burdastyle Andrew cardigan sew-along. I plan on starting before the end of this month (March 2014). I hope you can join in! The Flickr […]
[…] we get to enjoy the fun part of Burdastyle’s Andrew cardigan; sewing! In Part 1, we cut the pattern and fabric. Today in Part 2, let’s sew the the main body section, […]