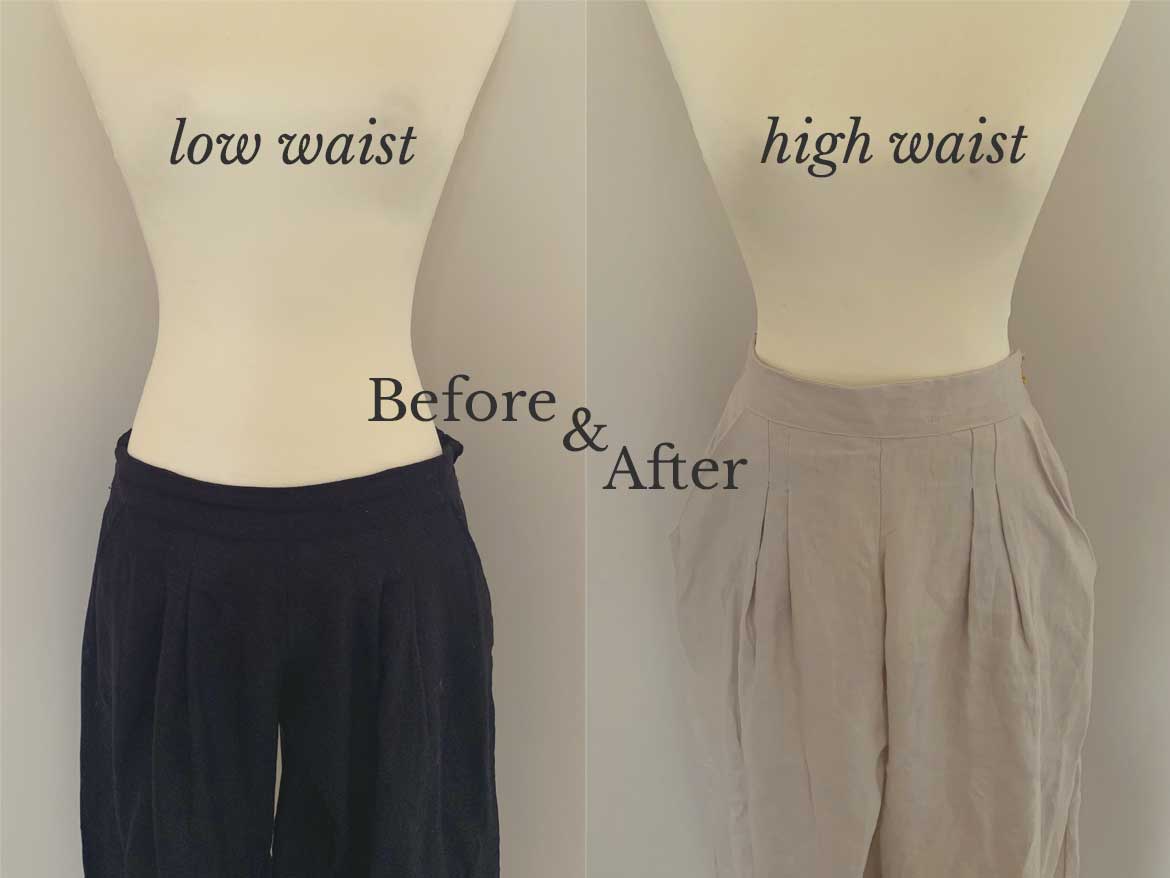
High waisted wide leg pants are incredibly feminine and sophisticated. Here’s a tutorial on how to alter a low to medium waist sewing pattern to create your own high waisted wide leg pants sewing pattern.

For this tutorial, I’m using the Hana Patterns Yoko Overalls pattern, which is a convertible pants / overalls with a low waist. We will be adding 13 cm (5″) to the crotch depth to turn your Yoko pants into high-waisted wide leg pants!

VIDEO TUTORIAL
Parts 1 to 3 of this tutorial are explained in this video:
PART 1: FRONT AND BACK PANTS
We will add 6.5 cm (2.5″) to each of the Front and Back Pants pattern pieces. Resulting in a total 13cm (5″) increase in crotch length across the two pieces.
Starting with the Front piece:

- Tape a piece of paper to the Front Pants pattern piece, to extend the waistline.
- Measure 6.5cm (2.5″) in two locations from the existing waistline. Draw a line joining the two dots.
- Extend the crotch line to meet the line drawn in Step 2.
- Extend the side seam line to meet the line drawn in Step 2.
- Copy the darts locations onto new waistline.
- Cut new pattern piece.
- Repeat with Back Pants pattern piece.

PART 2: POCKETS
The Front Pocket and Back Pocket pieces will all be adjusted using the same technique as Part 1. Make sure you extend the pattern pieces by exactly the same measurement as the pants patterns. In this example, we are extending by 6.5cm (2.5″).

PART 3: FRONT AND BACK BELTS
We need to decrease the belt width as it will now sit higher on the waist.
- To determine the new Front Belt measurement, place the Front Pocket on the Front Pants pattern.
- Measure the waistline of the original Front Pants pattern (A).
- Measure the waistline of the adjusted Front Pants pattern (B).
- Subtract B from A to find C, the difference in belt width required.
- Decrease width of Front Belt by C, which we calculated in the previous step. The easiest way to do this is to cut the belt pattern in half, along the centre.
- Since we have cut the belt in half, we will also need to divide C by 2. Decrease the belt width by half the value of C from the straight edge.
- Repeat Steps 2-6 for the Back Belt pattern adjustment. There is no pocket attached to the back of the pants, so you can skip Step 1.
This step reads to be more complicated than it actually is. I highly recommend you watch the video tutorial which explains it much better!
PART 4: ELASTIC
The elastic length for the waist will also need to be decreased.
The chart below shows the estimated elastic length for the high-waisted version of the Yoko pants:
[table id=3 /]

Hope this tutorial helps you get more out of an existing pants pattern. You can see another way I like to wear my Yoko pants in this 3 Ways to Wear a Kimono Jacket blog post. If you’d like to purchase a Yoko sewing pattern, head on over to Hana Patterns.
