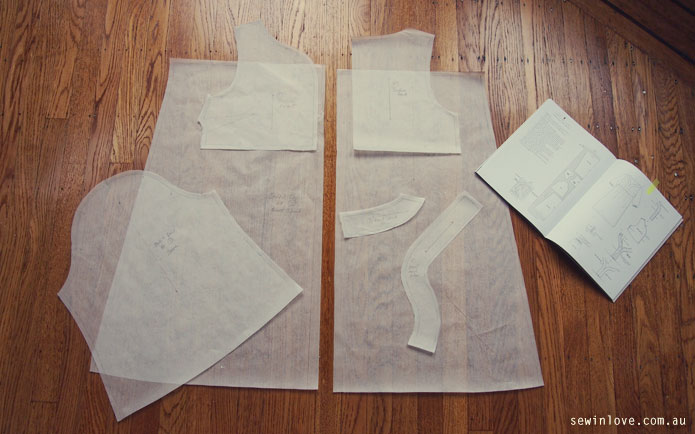
Yay, let’s start making Dress T from Stylish Dress Book: Wear with Freedom! This is Part 1 of a sew-along, where I’ll be breaking down the sewing steps in a series of blog posts.
I already chose my crepe de chine fabric last month, what did you choose?
Let’s start tracing
The pull-out sewing patterns in this book are printed on both sides, so it took me a while to locate all 7 pieces which need to be traced.
Tip 1: Before you start tracing, use your finger to follow along the outline of each pattern piece. You’ll get a better feel for the final size and shape of the piece you will trace. Some pieces are shared with other designs, so it can get really confusing.
Remember, the patterns do not include seam allowance, so you need to add them yourself. This step is explained with photos, step-by-step in my ebook, How to Sew Japanese Sewing Patterns 🙂
Tip 2: Although the book gives you seam allowance measurements in inches and metric, try to use the metric measurements, as it is more accurate.
Don’t forget to mark the double sided arrows for the fabric grain.
Cutting out the patterns
The curved sections are more tricky to cut, but if you’ve drawn each line carefully (I used a curved ruler), you’ll end up with a more accurate paper sewing pattern.
We’ll cut the fabric in the next part of this sew-along. Good luck with your tracing!


5 comments
I am trying hard to understand how to sew the curve neckline. This dress is for my daughter, Lara and I have it all cut but can’t make sense of how to do this part. I have made dresses E, F I and top B for her already and the black lace dress was a pain because it was black and I had to use the stabilizer for all seams. Please answer asap as I need to get it done by the end of today so I can send it to her. Connie
I’m so sorry for the delay Connie, I’ve had major issues with comments on the blog.
With the neckline, you need to stitch around the inner neckline with the wrong side of the dress and the right side of the neck trim facing each other.
Then, flip the neck trim around so that the right side of the dress is facing the wrong side of the neck trim.
Stitch the neck trim in place, and it’s done!
It was quite tricky, but as long as you keep pressing everything in place, it comes together nicely.
[…] Dress T from Stylish Dress Book: Wear with Freedom by Yoshiko Tsukiori, I cut the fabric, using the paper patterns we made in Part 1. I also applied interfacing to the […]
I can not seem to locate part 3 for this. Could you please post the link? Thank you.
Hi Janice – Sorry there’s no Part 3 because it took me so long to finish the dress and neglected to take photos at the very end. So sorry!