Now we get to enjoy the fun part of Burdastyle’s Andrew cardigan; sewing! In Part 1, we cut the pattern and fabric. Today in Part 2, let’s sew the the main body section, including the neckline and ribbed waistband.
Shoulder and Side Seams
I used a zig-zag stitch with a ball point needle for all of my seams, because I’m working with a sweatshirt knit fabric. It really helps to get the right settings by testing on scrap fabric. Ideally, you can neaten the seam allowances with a serger or overlocker. Unfortunately, my beloved overlocker is back home in Australia, so I used an overcast zig-zag stitch instead.
Neckline Facing
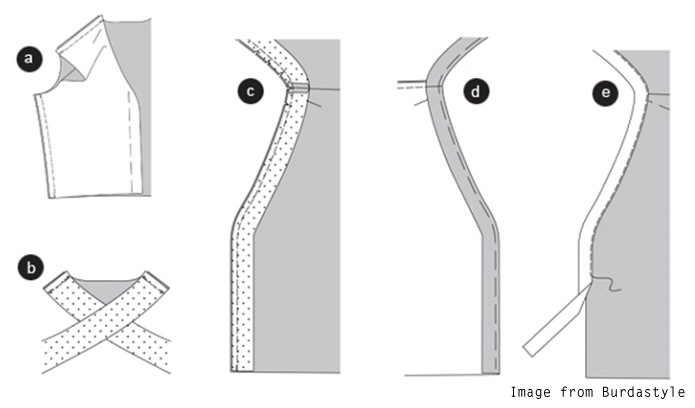
The instructions go into detail about using a woven trim for the neckline. I found this quite confusing, so here is what I did. First, zig-zag stitch along the outer edge of the neckline facing. Then, right sides facing, stitch the inner edge of the neckline facing to the front opening of the cardigan. Snip along the curves.
Attaching the Waist Band
Once you’ve made the waistband following Burdastyle’s instructions, pin it on to the cardigan. Turn the neckline facing and also pin this on to the waistband and cardigan’s hem.
After stitching the waistband on to the cardigan, zig-zag the edges together for a neat finish.
I also snipped the corner where the cardigan, waistband and neckline facing meet to remove some bulk.
Topstitch the Neckline
Fold the neckline facing back to the inside of the cardigan and topstitch with a straight stitch. This stitch is visible, so be extra careful about sewing straight!
I’m finding sweatshirt knit to be really fun and easy to sew. It’s not long to go now, in Part 3, let’s make the sleeves, attach buttons and finish the cardigan!


